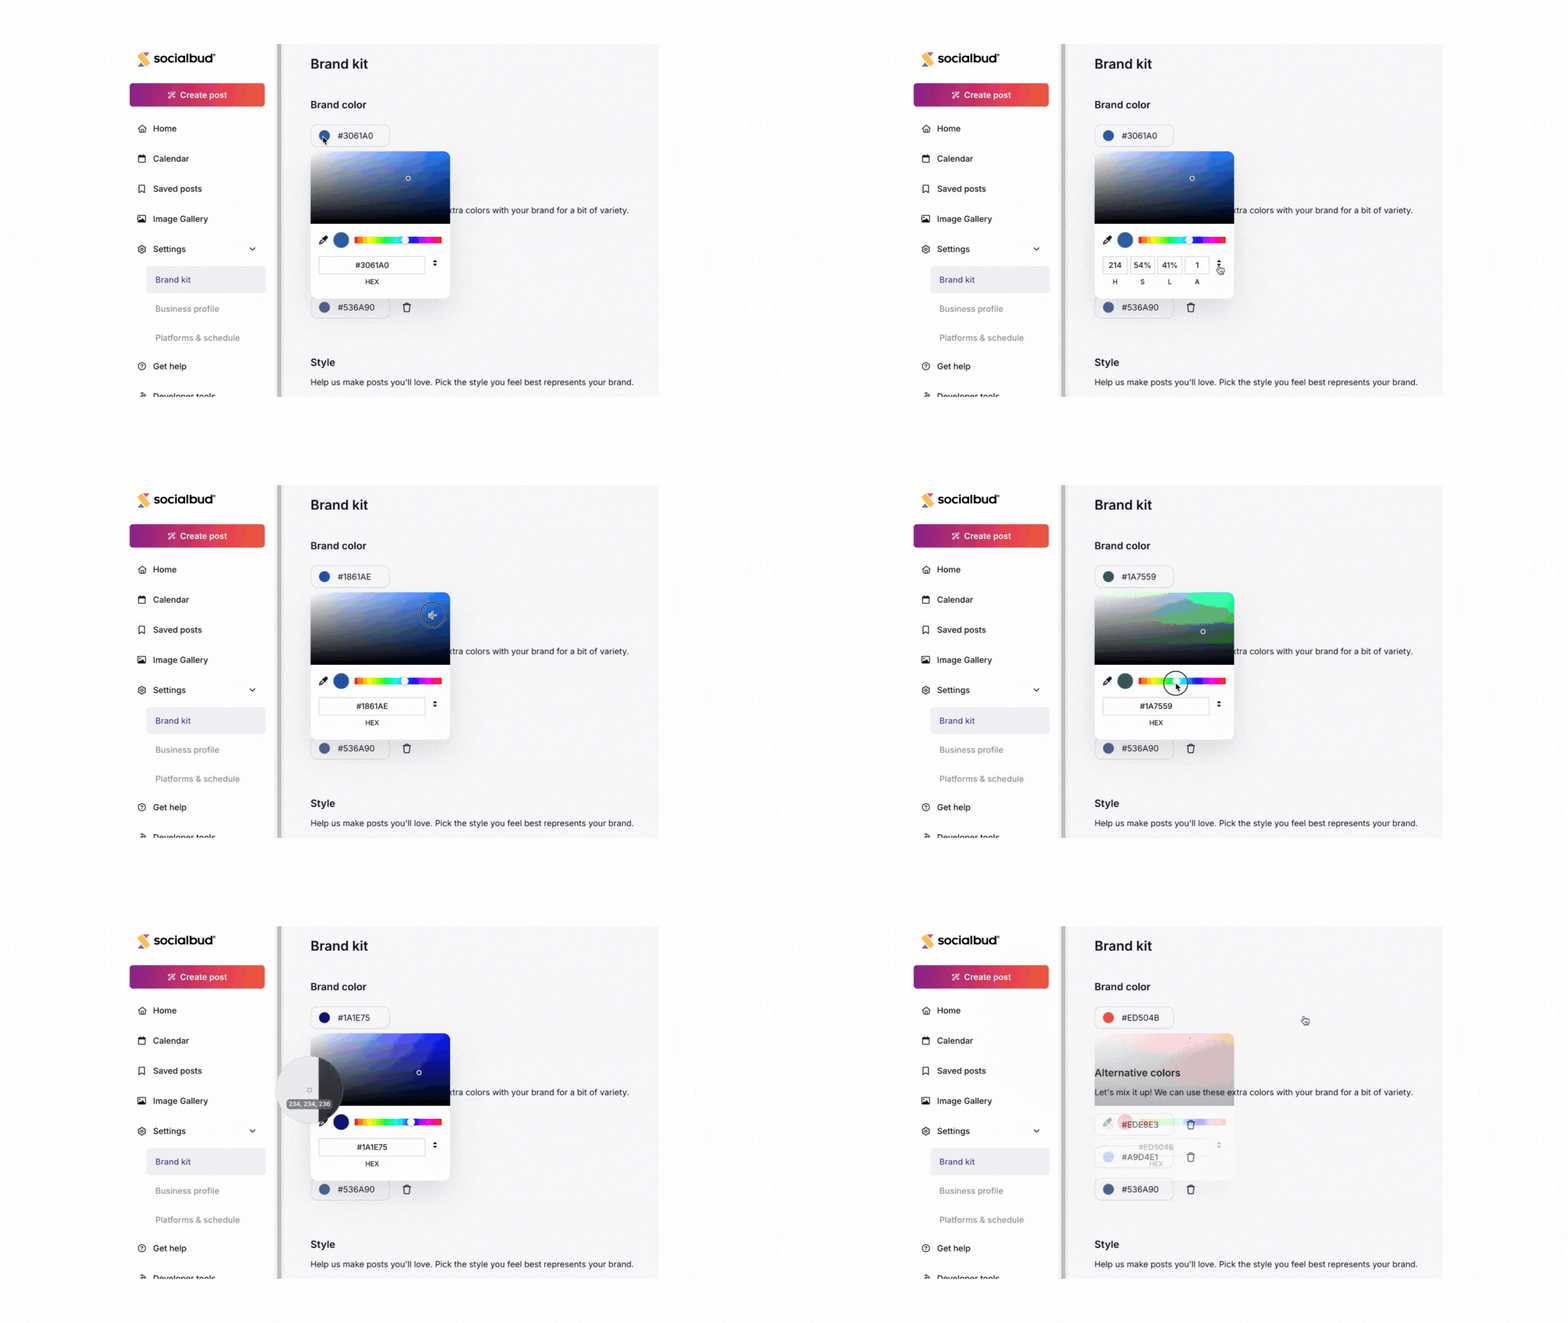
The Brand kit is your dedicated space for customizing your brand’s visual identity on Socialbud. This guide will walk you through how to find, set up, and use the Brand kit, ensuring your posts remain consistent and reflect your unique brand identity.
How to access the Brand kit
Follow these steps:
Log in to Socialbud
Use your registered email and password to access your account.Go to Settings
Once logged in, navigate to your account settings, which is located at the sidebar.Select the Brand kit kection
In your settings, click on the Brand Kit section.
Customization options in the Brand kit
The Brand kit page allows you to customize several key aspects of your brand's visual identity:
Brand color: Set your primary brand color.
Additional colors: Choose complementary colors for your brand.
Style: Select a visual style that aligns with your brand's identity.
Brand typography: Customize the fonts that reflect your brand’s personality.
How to customize your Brand identity
1. Setting your Brand color
Your Brand color will be used in various elements of your posts.
Here’s how to set it:
Locate the Brand color section in the Brand kit.
Click on the field where you can see your actually brand color and a HEX code.
This will open a color picker tool that allows you to fine-tune your selection. You can adjust the hue, saturation, and brightness until you've got the perfect shade that represents your brand. If you already have a specific HEX code in mind, you can simply enter it in the designated input box for immediate application.
Tips:Use sliders or numeric inputs to fine-tune the color.Enter HEX, RGB, or HSL values for precision.Alternative method:
You can also use the eyedropper tool to select a color from an image. Simply click on the eyedropper icon, choose your image, and click the color you want.This method may not provide the same level of precision as entering specific color codes.

2. Setting additional colors
Adding complementary colors helps maintain brand cohesion while giving your posts more variety. Here’s how to add additional colors:
Use the color picker or input HEX, RGB, or HSL values to set complementary colors, as you did for the brand color.
Please note:
The recommended colors will complement your brand color. Changing them may result in a mismatch.
Managing additional colors:
If you no longer need certain colors, you can delete them by clicking the trash icon. Only the active colors will be used in your posts.
3. Choosing a visual style
The Style setting defines the overall look and feel of your auto generated posts. Socialbud offers a variety of style options to match your brand’s personality.
Here’s how to select one:
Browse through the displayed style options.
Choose the style that best represents your brand.
Only one style can be selected at a time.
4. Setting Brand typography
Help us make posts you'll love. Pick the typography style that best represents your brand.
Steps:
On the displayed cards, you’ll find different typography styles.
Choose the one that fits your taste or matches your brand’s identity.
We will then automatically apply the most suitable typography for your posts.
Only one typography style can be selected at a time.
How the Brand kit affects your automatically generated posts
Once you’ve customized your Brand kit, your settings will automatically apply to your auto generated posts. Here’s how each element influences the design:
Brand colors: Used for borders, highlights, and text backgrounds, text colors.
Typography: Specifies the appearance of captions and text overlays on the visuals of your auto-generated posts.
Style: Adjusts the overall design and mood of your posts, aligning them with your brand identity.
Benefits of using the Brand kit
Consistency Across Posts: Maintain a professional, cohesive look by ensuring all your posts align with your brand guidelines.
Efficiency in Content Creation: Save time by letting Socialbud automatically apply your brand’s colors, typography, and style to your posts.